
Troubleshooting Veneer Knife Grinding Defects: Edge Burning, Chatter Marks & Bowing Prevention
Troubleshoot industrial veneer knife grinding defects: eliminate edge annealing, wheel chatter ripples, blade bowing, and wire burrs with proven workshop remedies.
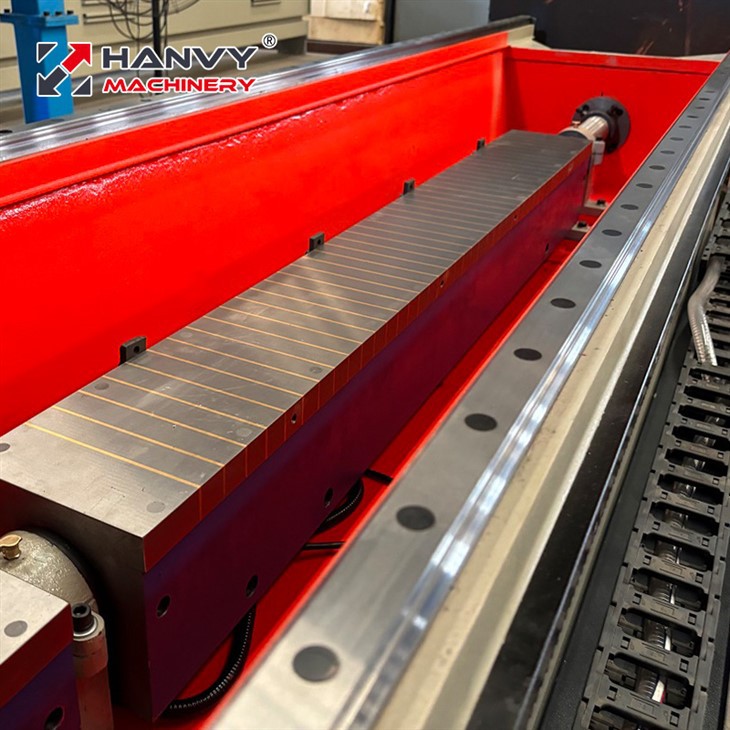
In industrial veneer peeling and plywood manufacturing, the cutting edge of a peeling knife is subject to intense hydraulic and mechanical forces. Even microscopic grinding imperfections—such as edge annealing, wheel chatter ripples, or longitudinal bed distortion—immediately manifest as wavy veneer surfaces, inconsistent thickness tolerances, or catastrophic blade chip-outs.
This troubleshooting engineering guide identifies the root causes of the 5 most costly knife grinding defects and provides clear corrective actions and workshop operating benchmarks.
Diagnostic Matrix: Common Grinding Failures & Corrective Actions
| Defect / Problem | Visual Symptom on Knife | Impact on Veneer Quality | Root Cause Analysis | Corrective Action & Remedy |
|---|---|---|---|---|
| 1. Edge Burning & Temper Loss | Blue, brown, or straw-colored discoloration along blade tip | Rapid edge dulling within 1 hour; excessive tear-out | Excessive infeed downfeed (> 0.03 mm/pass); glazed wheel; low coolant flow rate | Reduce downfeed to ≤ 0.01 mm; dress wheel with diamond tool; direct dual coolant nozzles directly onto point of contact |
| 2. Chatter Marks & Ripple Patterns | Periodic vertical or wavy washboard lines on bevel face | Veneer thickness variation exceeding ±0.15 mm; machine vibration | Spindle bearing wear; unbalanced grinding wheel; worn carriage guide rollers | Dynamic balance grinding wheel; replace spindle angular contact bearings; adjust carriage roller preload |
| 3. Longitudinal Knife Bowing | Knife center is narrower or wider than ends by > 0.05 mm | Uneven pressure across log; hollow or tapered veneer sheet | Thermal expansion from dry grinding; uneven magnetic chuck pull; uncalibrated bed | Verify chuck straightness using 0.01 mm dial indicator; clean bottom face of knife prior to magnetic clamping |
| 4. Wire Burrs & Feathered Edge | Ragged, malleable metal burr adhering to knife face side | Rough veneer back; knife marks and score lines | Finishing passes completed with coarse abrasive; zero spark-out passes | Execute 3–5 zero-feed spark-out passes; finish deburr manually using fine Arkansas oil stone at 5° angle |
| 5. Bevel Angle Inconsistency | Measured angle varies between center and ends (e.g. 19.5° vs 21.0°) | Erratic lathe peeling performance; poor log entry | Magnetic chuck tilt lock slippage; pivot pin wear; foreign debris under bed | Tighten hydraulic chuck locking clamp; inspect bed trunnion bearings; re-calibrate digital angle display |
4 Critical Factors for Achieving Mirror-Bevel Edge Quality
1. Coolant Chemistry and Temperature Management
- ✓Never Grind Dry: Grinding an alloy veneer knife dry creates instantaneous surface temperatures exceeding 800°C, causing micro-structural metallurgical transformation from tempered martensite to untempered martensite, making the steel brittle.
- ✓Coolant Concentration: Maintain a 5% to 7% synthetic or semi-synthetic grinding fluid concentration. Use a refractometer to check Brix levels daily. Maintain coolant reservoir temperatures below 30°C using an auxiliary chiller in hot climates.
2. Grinding Wheel Selection & Dressing Frequency
- ✓Abrasive Grit Matching:
- ✓*Roughing & Repair*: White fused alumina (WA) or ceramic abrasive, 46 to 60 grit with open porous structure (Vitrified bond).
- ✓*Fine Finishing*: 80 to 120 grit wheel for smooth, low-friction micro-finishes.
- ✓Regular Diamond Dressing: A glazed wheel cannot cut clean; it rubs and generates frictional heat. Dress the cup wheel face after every 3 to 4 long knives or whenever discoloration begins to appear.
3. Magnetic Chuck Cleanliness and Demagnetization
Before clamping a knife:
- 1Thoroughly wipe the magnetic chuck surface with a clean cloth. A single trapped wood chip or metal shaving (even 0.02 mm thick) will cock the blade, causing an uneven grind along its length.
- 2Ensure the knife's rear mounting edge and back face are free from rust, dried wood sap, and burrs.
4. Proper Hand-Stoning and Final Honing Technique
After the automated grinding cycle completes, the knife must be carefully un-clamped and hand-honed:
- ✓Apply light honing oil to a fine-grit natural Arkansas stone or hard ceramic slip stone.
- ✓Place the stone flat against the knife face (flat side) with zero tilt to remove the wire burr without dubbing the edge.
- ✓Move the stone in sweeping overlapping circular motions along the entire length. Never draw the stone across the sharp edge perpendicular to the bevel.
Frequently Asked Questions (FAQ)
What causes a veneer peeling knife to chip immediately upon hitting the log?
Immediate chipping is usually caused by: 1. Thermal micro-cracks resulting from aggressive, dry grinding, 2. Over-tempered or annealed cutting edge (hardness dropped below 58 HRC), or 3. Grinding the bevel angle too thin (e.g., 17° on dense, un-debarked hardwood logs).
How can a mill determine if a knife grinder chuck needs re-facing?
Mount a magnetic dial test indicator to the moving wheel carriage with the stylus contacting the ground reference face of the magnetic bed. Traverse the carriage from end to end. If total indicated runout (TIR) exceeds 0.025 mm over a 3,000 mm stroke, the bed must be re-ground in place using the machine's own grinding head.
Why do chatter marks appear on the veneer knife bevel?
Chatter marks are caused by mechanical harmonic vibration—most commonly an unbalanced grinding wheel, excessive play in the carriage linear bearings, or spindle bearing clearance exceeding 0.005 mm.
❓ Frequently Asked Questions
Q:What causes a veneer peeling knife to chip immediately upon hitting the log?
Immediate chipping is usually caused by thermal micro-cracks resulting from dry grinding, over-annealed cutting edges (hardness below 58 HRC), or an excessively thin bevel angle.
Q:How can a mill determine if a knife grinder chuck needs re-facing?
Mount a dial test indicator to the wheel carriage. If total indicated runout exceeds 0.025 mm over a 3,000 mm stroke, the bed must be re-ground in place using the machine's own wheel head.
Q:Why do chatter marks appear on the veneer knife bevel?
Chatter marks are caused by harmonic vibration—most commonly an unbalanced grinding wheel, excessive play in the carriage bearings, or spindle bearing clearance exceeding 0.005 mm.
Hanvy Machinery Engineering Team
Engineered with 30+ years of industrial plywood machinery manufacturing expertise. Over 500 turnkey production plants installed in 69 countries worldwide.
Recommended Industry Guides

Veneer Scarf Jointing vs. Core Composing: How to Produce Oversized & High-Strength Plywood Panels
Engineering comparison of veneer scarf jointing and core composing: 1:10 bevel geometry, longitudinal tensile strength, thermal thread composing, and machinery for container flooring and marine plywood.

Short Cycle Melamine Laminating Hot Press Machine: The Complete Industrial Guide for Plywood & Panel Mills
Industrial guide to short cycle melamine laminating presses: technical specifications, fast pre-fill hydraulics, 15-30s press cycles, thermal oil platens, and economic ROI for plywood and panel mills.

CNC Veneer Knife Grinder Selection & Maintenance: The Industrial Guide to Razor-Sharp Peeling Precision
Engineering selection guide for industrial veneer peeling knife grinders: electromagnetic chuck vs. mechanical beds, variable-speed traverse drives, CNC auto infeed cycles, and preventive maintenance SOP to achieve sub-micron blade straightness.